
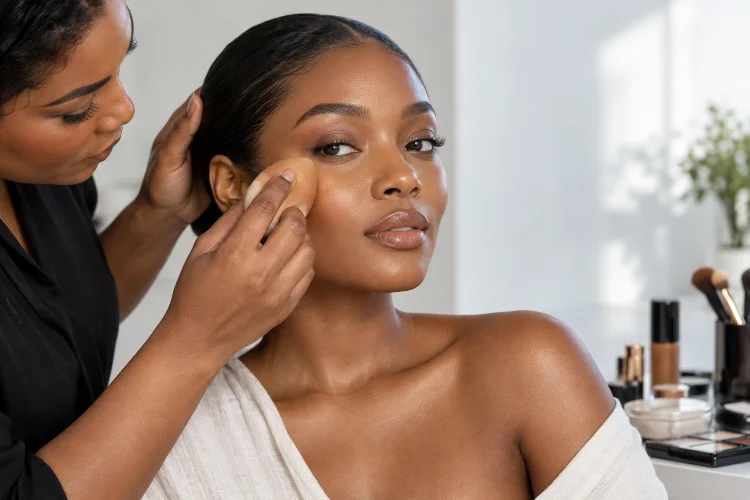
A great complexion rarely looks like makeup sitting perfectly on top of the skin. The most convincing base usually looks like healthy skin that simply happens to be more even, balanced, and softly polished.
That difference becomes especially important when you move beyond basic foundation application. Advanced complexion techniques for seamless natural-looking makeup are less about covering everything and more about controlling texture, coverage, light, and color with precision.
Instead of applying the same amount of product everywhere, professional-style makeup treats different areas of the face individually.
The goal is not to erase pores, freckles, natural shadows, or every tiny imperfection. It is to make the complexion look intentional while preserving the characteristics that make real skin believable.
That requires thoughtful skin preparation, carefully chosen textures, strategic concealing, controlled powder placement, and subtle dimensional work. Once these techniques become familiar, creating a polished base can actually require less product – not more.
Start With Skin Preparation, Not Foundation
Natural-looking complexion makeup begins before foundation touches the face. When the surface is dehydrated, overly oily, flaky, or covered with layers of incompatible skincare, even an expensive foundation can become patchy.
A good preparation routine should respond to what your skin needs that particular day. Vogue’s makeup experts emphasize cleansing, appropriate hydration, gentle exfoliation when necessary, and giving skincare enough time to settle before applying makeup.
Dry areas may benefit from slightly richer hydration, while oily areas often need lighter skincare. Instead of automatically covering the entire face in primer, consider applying it only where it solves a specific problem, such as enlarged-looking pores around the nose or excess shine through the T-zone.
The important idea is balance. Skin should feel comfortable and flexible, not slippery. Too much moisturizer can cause foundation to move, while insufficient hydration can make pigment cling to dry texture.
Match Foundation to the Skin Rather Than the Trend
A seamless complexion depends heavily on choosing the right foundation texture and coverage level. A popular matte or luminous finish may look beautiful on someone else but behave very differently on your skin.
Sheer and light-coverage formulas usually make achieving a skin-like result easier because they allow natural variation to remain visible. Medium coverage can also look extremely natural when applied in thin layers rather than one heavy coat.
Foundation should ideally disappear into the neck and surrounding skin rather than create a perfectly uniform mask. Undertone matters here just as much as depth. A foundation can be technically light or dark enough while still looking wrong because it is too yellow, pink, peach, or neutral.
Testing shades in natural daylight is particularly helpful. Give the product a few minutes to settle before deciding, because some formulas can shift slighly as they dry.
Use Thin Layers and Build Coverage Strategically
One of the biggest differences between basic and advanced complexion application is product distribution.
Instead of applying an equal layer of foundation from forehead to jawline, begin with a small amount where discoloration is most noticeable. For many people, that means the center of the face around the nose, cheeks, chin, and between the brows.
Then blend outward using progressively less product.
This technique keeps more pigment where it is useful while leaving areas that already look even relatively untouched. Professional makeup artist Mario Dedivanovic has similarly recommended beginning with a small amount of foundation, concentrating it where coverage is needed, and building only when necessary.
A dense brush can provide controlled coverage, while a damp sponge can soften visible edges afterward. Fingers are also useful for pressing lightweight formulas into the skin because body warmth can help the product merge with the complexion.
The final result should appear continuous even though the actual amount of foundation varies from area to area.
Treat Concealer as Precision Correction
Heavy concealer everywhere can quickly destroy the illusion of natural skin. Advanced complexion work uses concealer almost like a retouching tool: small amounts placed exactly where additional correction is needed.
For blemishes, choose a concealer close to your actual skin tone rather than a lighter shade. Place a tiny amount directly over the discoloration, allow it to sit briefly, and tap around the edges without disturbing the center.
Under the eyes, the strategy is different. Concentrating concealer near the inner corner and deepest shadow often looks more natural than painting a large triangle beneath the entire eye.
You can also use color correction before concealer when discoloration is pronounced. Peach or orange-toned correctors may reduce the appearance of blue or purple darkness, while carefully selected green-toned products can soften visible redness.
Use very little. Color correction should become almost invisible once complexion products are applied, not create another thick layer that needs covering.
Preserve Natural Texture Instead of Trying to Erase It
Real skin has pores, tiny lines, peach fuzz, and subtle changes in texture. Trying to eliminate all of them usually leads to the very cakey finish people are trying to avoid.
The more realistic approach is managing texture instead of hiding it.
Apply complexion products with a light touch, particularly over acne-prone or sensitive skin. The American Academy of Dermatology recommends gentle makeup application and notes that acne-prone users may want products labeled oil-free, non-comedogenic, or formulated not to clog pores.
Where texture is noticeable, avoid aggressive buffing. Pressing or lightly stippling product often creates a smoother visual effect because it does not repeatedly move foundation across raised areas.
Clean tools are equally important. Brushes, sponges, and applicators should be washed regularly rather than being used continously while carrying old makeup, skin oils, and residue.
Powder Only Where the Complexion Needs Control
Powder is incredibly useful, but applying it everywhere automatically can flatten an otherwise realistic base.
Instead, think of powder as local shine control.
A small brush or puff allows you to set areas such as the sides of the nose, center of the forehead, chin, and under-eye region while leaving the outer cheeks more luminous. This contrast between softly matte and naturally reflective areas gives the face dimension.
For oily skin, avoid repeatedly adding powder on top of accumulated oil throughout the day. Makeup artists cited by Allure recommend blotting excess oil first and then applying only a minimal amount of fresh powder.
This prevents the increasingly thick mixture of sebum, powder, and foundation that can emphasize pores and fine texture.
Finely milled powder is often prefered for natural complexion work because it can reduce unwanted shine without creating a visibly dusty surface.
Create Dimension Without Obvious Contouring
After evening the complexion, the face can sometimes look flatter than it did before makeup. Foundation reduces discoloration, but it also reduces some of the natural tonal differences that give the face shape.
The solution is not necessarily dramatic contouring.
Use bronzer or a soft contour shade sparingly around areas where natural shadow would normally appear. The hairline, upper temples, subtle cheek hollows, and jaw can receive small amounts of product, but every edge should disappear into the surrounding complexion.
Blush restores another important source of natural color. Rather than creating an isolated patch on each cheek, blend the edges into the surrounding skin and, when appropriate, slightly toward the temples.
Highlighter should be equally restrained. For genuinely seamless makeup, choose a product with fine reflective particles rather than obvious glitter. Apply it to areas that would catch light naturally, such as the upper cheekbones.
The effect should register as healthy skin before it registers as highlighter.
Finish by Merging the Layers Together
Even careful complexion application can sometimes leave foundation, powder, blush, and bronzer looking like seperate layers.
A light setting mist can help reduce that powdery appearance and visually merge products. After spraying, allow the mist to settle naturally or gently press the complexion with a clean sponge.
You can then inspect the makeup in daylight rather than relying entirely on bathroom lighting. Look especially around the hairline, eyebrows, jaw, sides of the nose, and under the eyes, where unblended product often collects.
At this stage, resist the temptation to keep adding makeup.
Often, advanced complexion work improves when something is removed. A clean sponge can lift excess foundation, a tissue can soften too much blush, and a small brush can remove unnecessary powder.
The FDA also recommends following cosmetic labels, keeping makeup and containers clean, avoiding shared cosmetics, and discontinuing products that develop unusual changes in color or smell.
Mastering advanced complexion techniques for seamless natural-looking makeup is ultimately about restraint and precision. Beautiful skin-like makeup does not require covering every pore or applying maximum coverage across the entire face.
Prepare the skin according to its current condition, use foundation in thin targeted layers, conceal only where extra correction is necessary, and apply powder strategically. Then restore dimension with subtle bronzer, blush, and controlled luminosity.
Most importantly, allow real skin to remain visible. Texture, freckles, natural shadows, and minor variations are often what make complexion makeup convincing.
The next time you create your base, try using less product but placing it more deliberately. Small changes in application can make the finished makeup look dramatically more refined.